Workflow Designer
The Workflow Designer is one of the development tools available in uContact that allows you to create custom workflows with different functionalities for use across various channels, customize blacklist validation, create custom webhooks, and much more!
General structure of the designer
The designer interface is divided into two important sections.
- The left section contains information related to the flow, such as its name, status, context, and more.
- The right section contains the canvas where you'll work by adding and connecting activities to create different functionalities.
Information
From here, you can view relevant information about the flow.
- Flow Name: The name of the flow.
- Context: The context associated with the flow.
- Status: Indicates the current status of the flow. It can be "development" or "production."
- Last Production: The last time the flow was deployed to production.
Activities
Here, you'll find a list of activities you can use in the flow. Only activities that can be used in the type of flow you’re creating will appear.
You can access a full list of activities along with detailed explanations on how to use them.
Work canvas
The work canvas is where you can drag and connect activities to create the different logics of the flows.
If your flow captures sensitive customer information, we recommend NOT storing it in uContact. Instead, use integrations with specialized external systems for handling this type of data, ensuring maximum security and regulatory compliance.

Functionalities
What are the types of flows?
In uContact, you can create different types of flows. Each type is designed to achieve a specific goal. They are all created from the Automation module.
IVR and IVR functions
IVRs are found in the Automation tab. When creating a new IVR, you'll have the option to create an IVR, a simple IVR, or an IVR function. Functions are a tool that developers use to manage their IVRs and make them more readable.
Bots and Bot functions
Bots are found in the Automation tab. When creating a new bot, you’ll have the option to create a bot or a bot function. Bots can only be used in campaigns, and functions are simply a tool for developers to manage their flows and make them more readable. Bots will run at the beginning of an interaction or when the interaction ends.
Webhooks
uContact allows us to create custom webhooks. These are found in the Automation tab. The URL to access our webhooks will be: https://instancia.ucontactcloud.com/api/webhook/{WebhookName}
Connector
We can create a flow for each connector. A flow button will appear in the connector form, which will open the Workflow Designer.
Blacklist
This is a unique flow that can be accessed from the blacklist section in the campaign tab.
By default, it will manage the blacklist for each interaction using the application's data, but it can be modified to use a different API or database if desired.
Telephony Configuration
These flows can be found in the configuration tab in the flows section. By default, we’ll see several pre-configured flows, but it is not recommended to modify them in most cases. IVRs should be used instead.
Functionalities
Within the canvas, you have several functionalities that you can use for specific purposes.
Export and Import
We can export by simply clicking the export button, which will download a txt file containing the flow. To import a flow, we’ll be asked to select a file, and we must choose a valid flow that was previously exported.

Zoom
We can zoom in, zoom out, and return to the default zoom with the buttons or by using ctrl+mouse wheel.
Undo and Redo
We can undo and redo a selection using the keyboard (ctrl+z ctrl+y or command+z command+y) or by pressing the buttons in the bottom left corner.
Copy and Paste
We can copy and paste a selection using the keyboard (ctrl+c ctrl+v or command+c command+v). 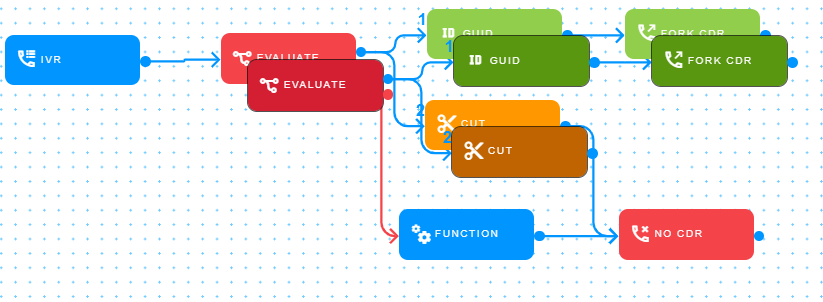
Or we can copy and paste a specific activity by clicking the copy button in the activity menu. 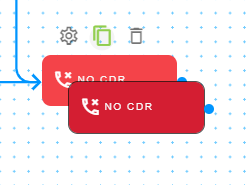
Console
The console allows us to debug the flow while it is running. 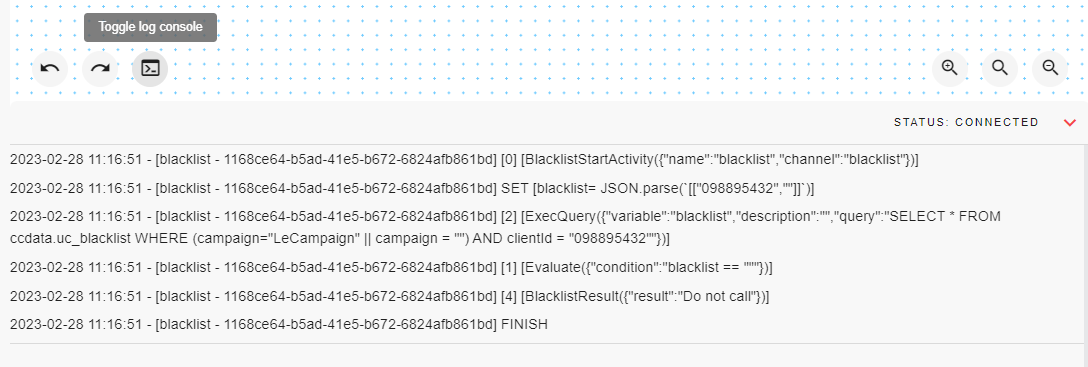
For telephony flows, we’ll see the entire Asterisk log and have the option to filter the lines as needed. We can add a filter by simply typing it and clicking the add button. 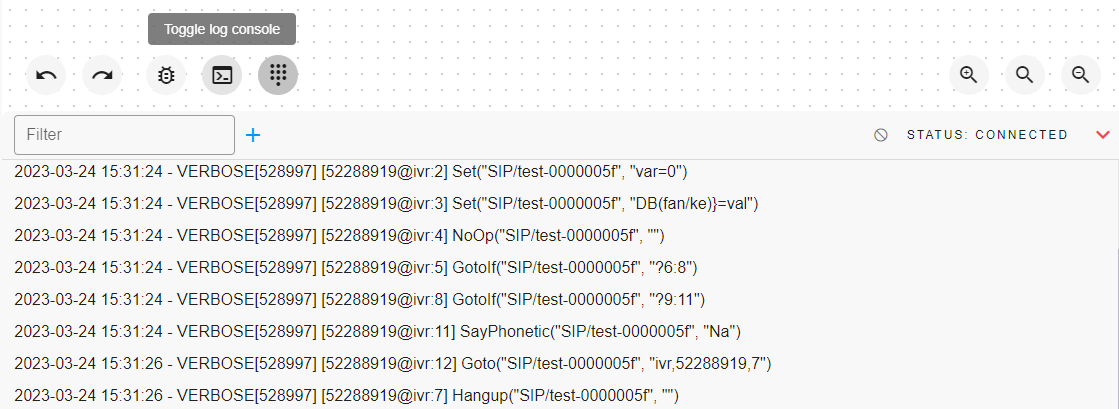
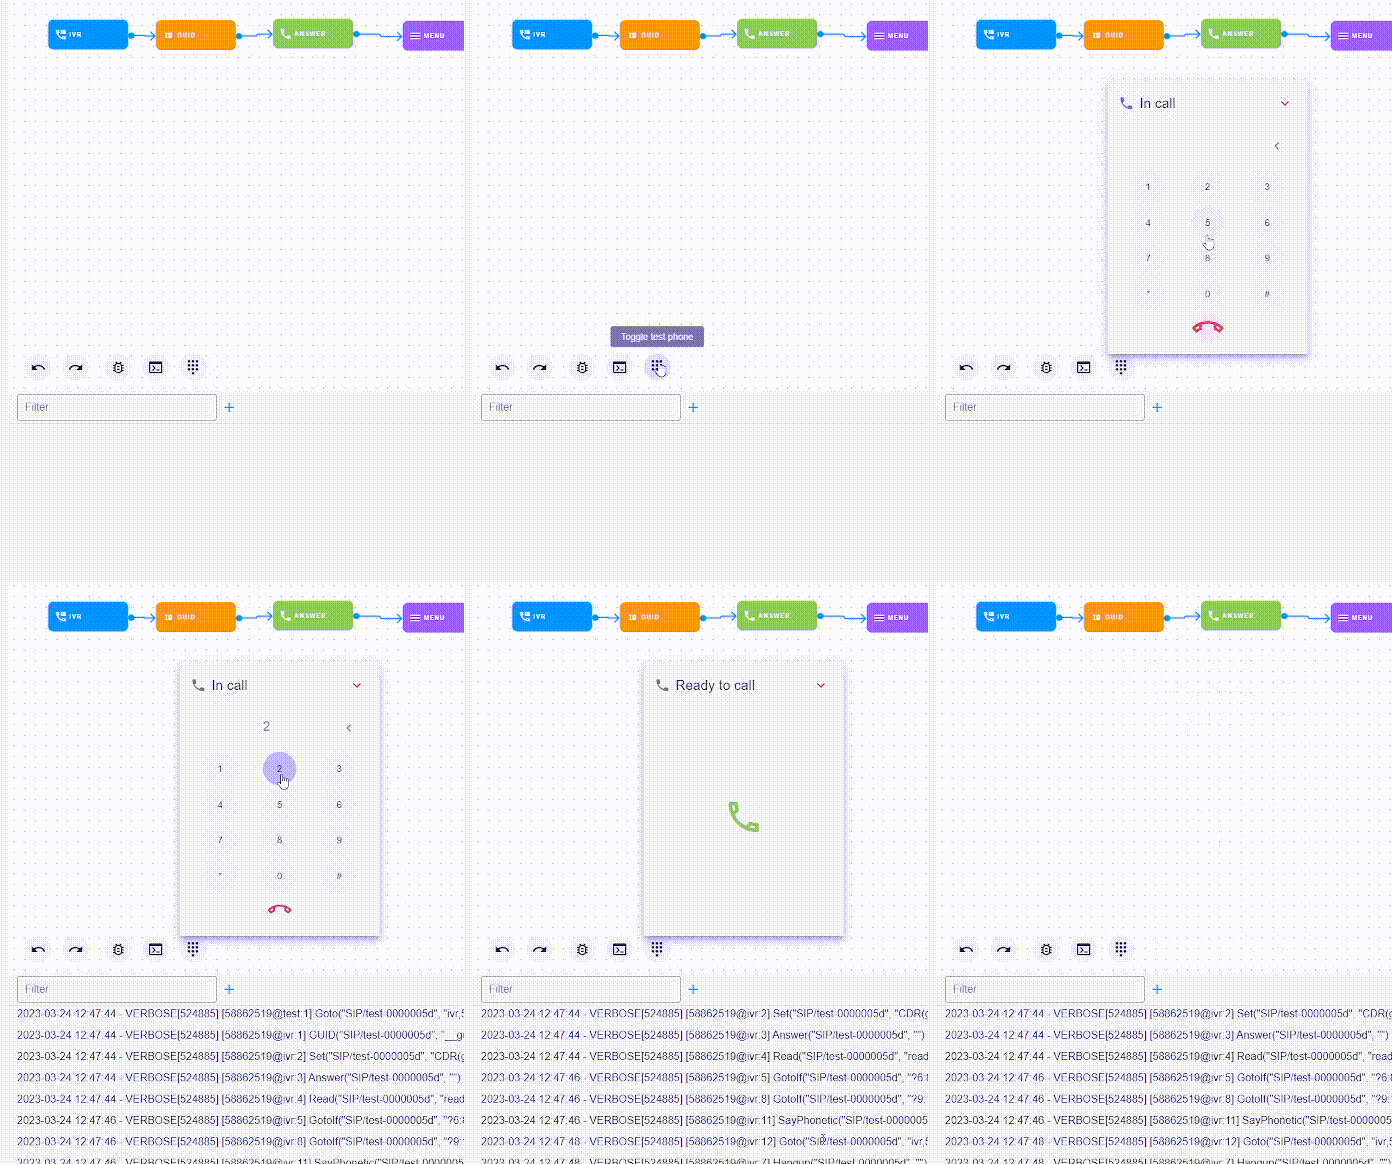
Test Phone
This tool is available for telephony flows and allows us to make a call directly to the flow so we can debug it in real-time.
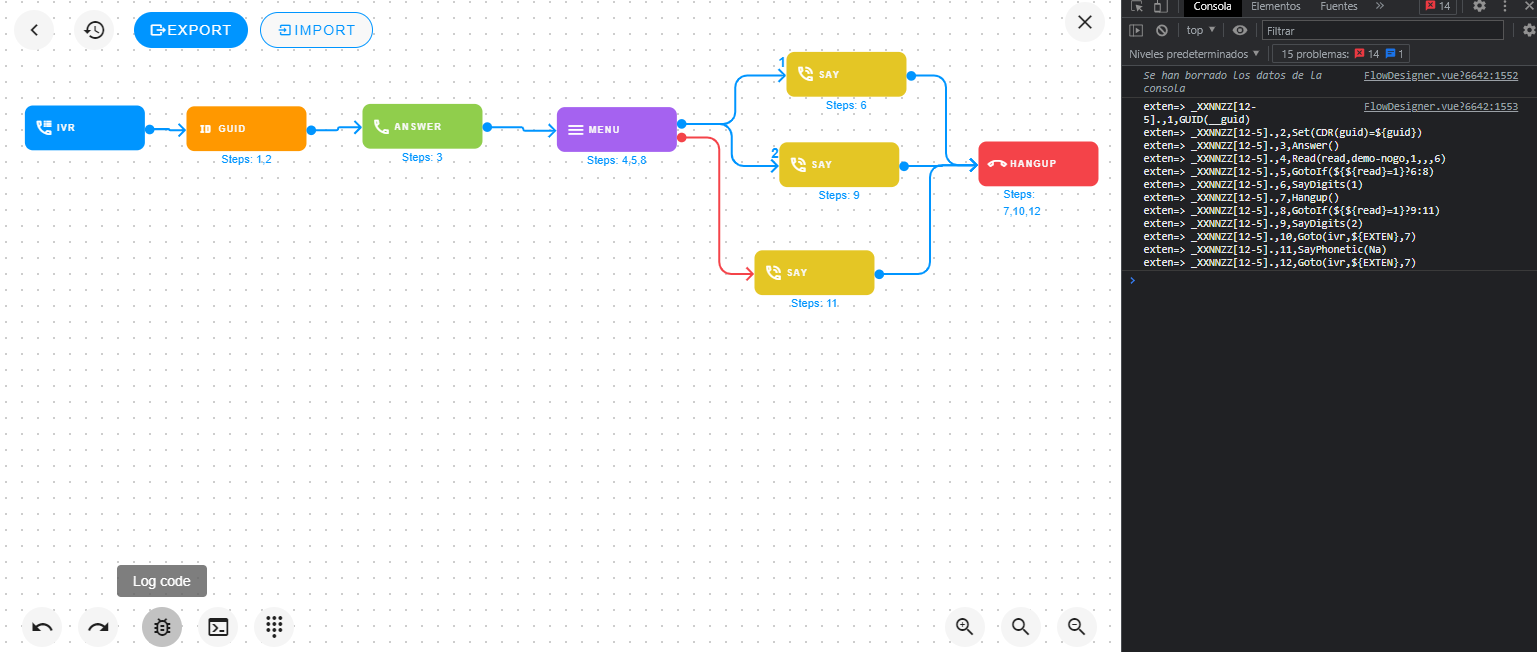
Log
This option will only be available for telephony flows. By clicking, the Asterisk code for the flow will be shown in the browser console, and under each activity, the corresponding steps will be displayed.
Usability of the Workflow Designer
Now, let's show you how you can interact with the designer.
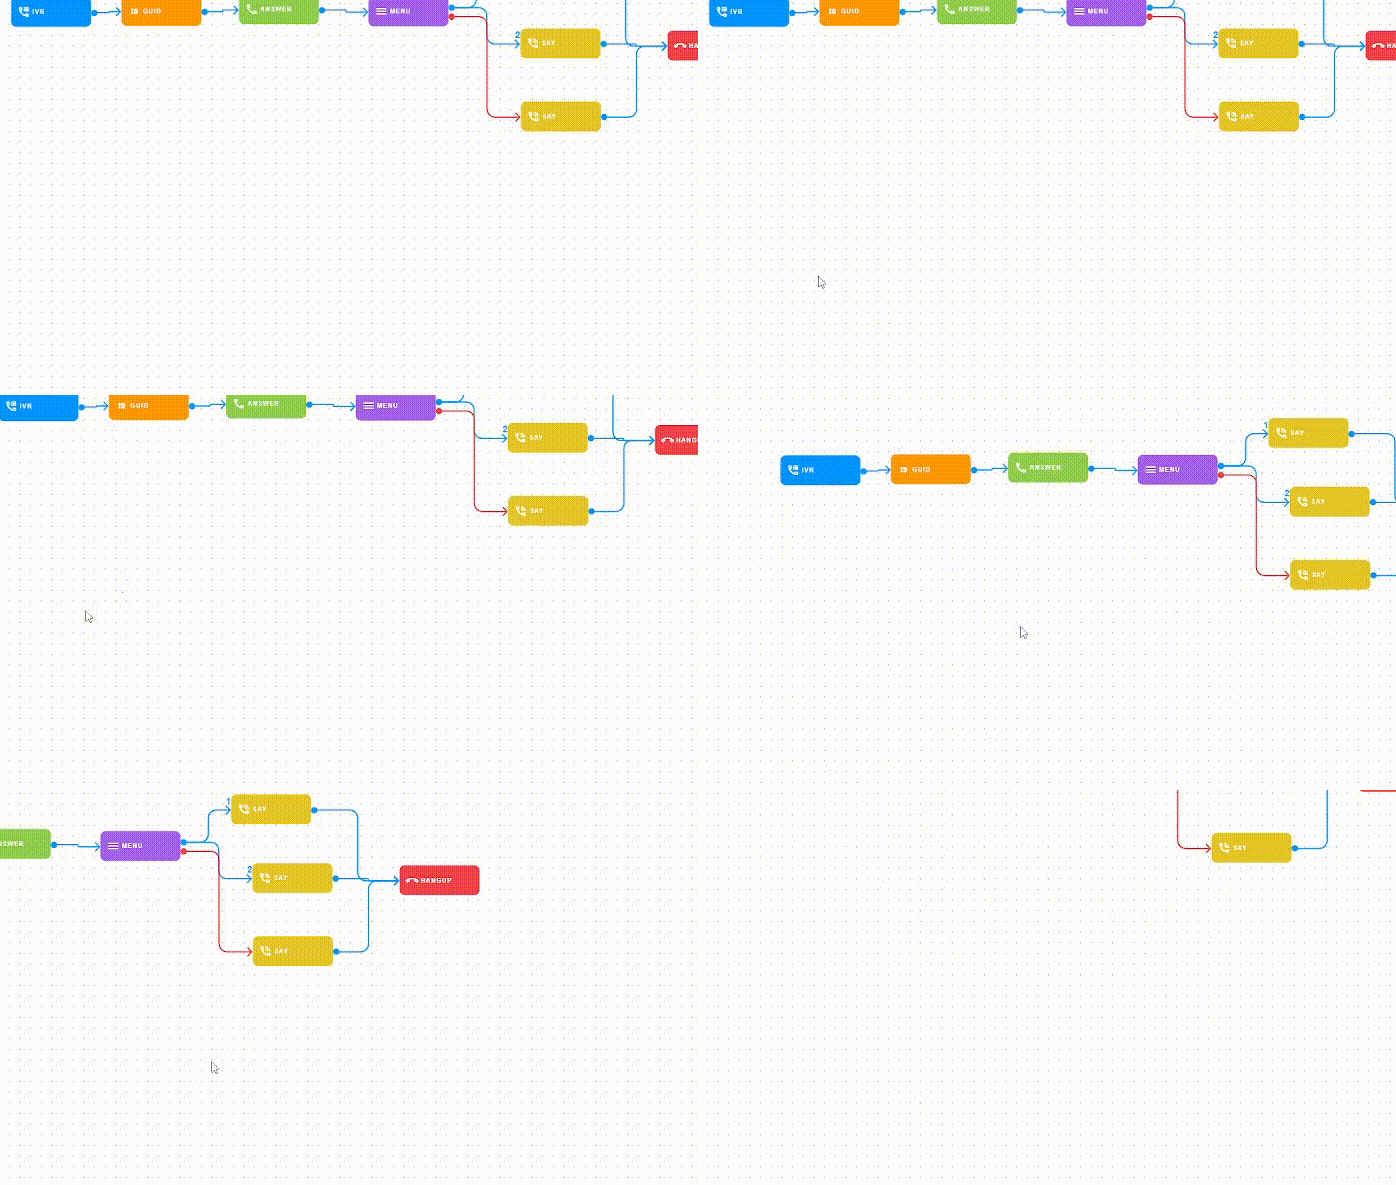
How to move around the canvas?
You can move the canvas by pressing ctrl+click and dragging.
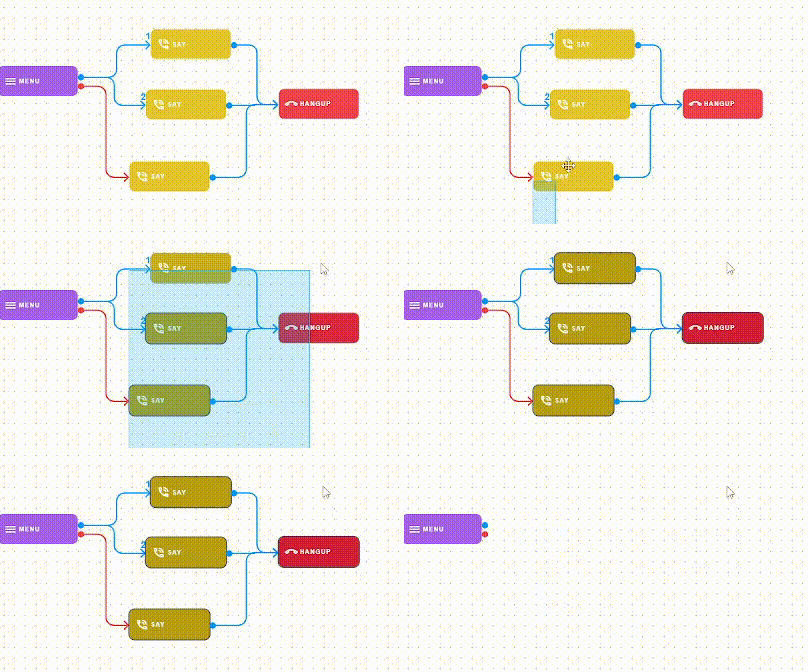
How to select?
By clicking on the canvas, you start a selection. You can only select activities (not connections or redirects). You can also select activities individually by holding down ctrl or cmd.
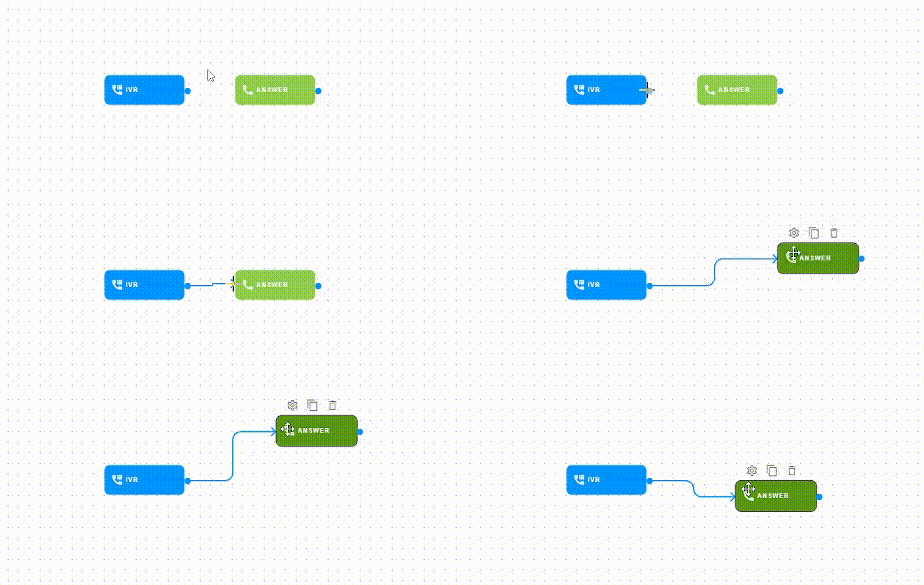
How to add an activity?
To add an activity, you need to drag it from the left menu and drop it onto the canvas. If you hover over an activity, you’ll see the floating menu, where you can open the activity form, copy and paste the activity, or delete the activity.
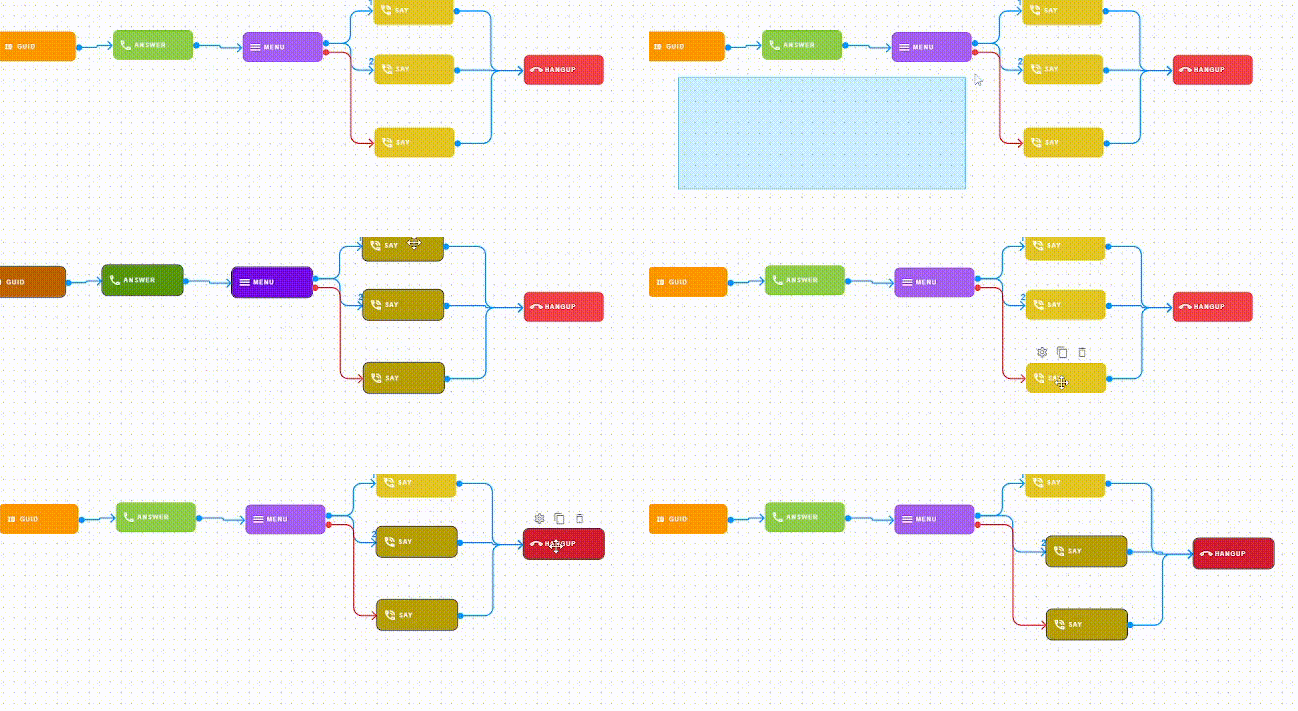
How to move an activity?
To move an activity or selection across the canvas, simply click and drag one of the selected elements.

How to connect activities?
To connect two activities, click the output point on the right of one activity, then drag and drop it onto the other activity.
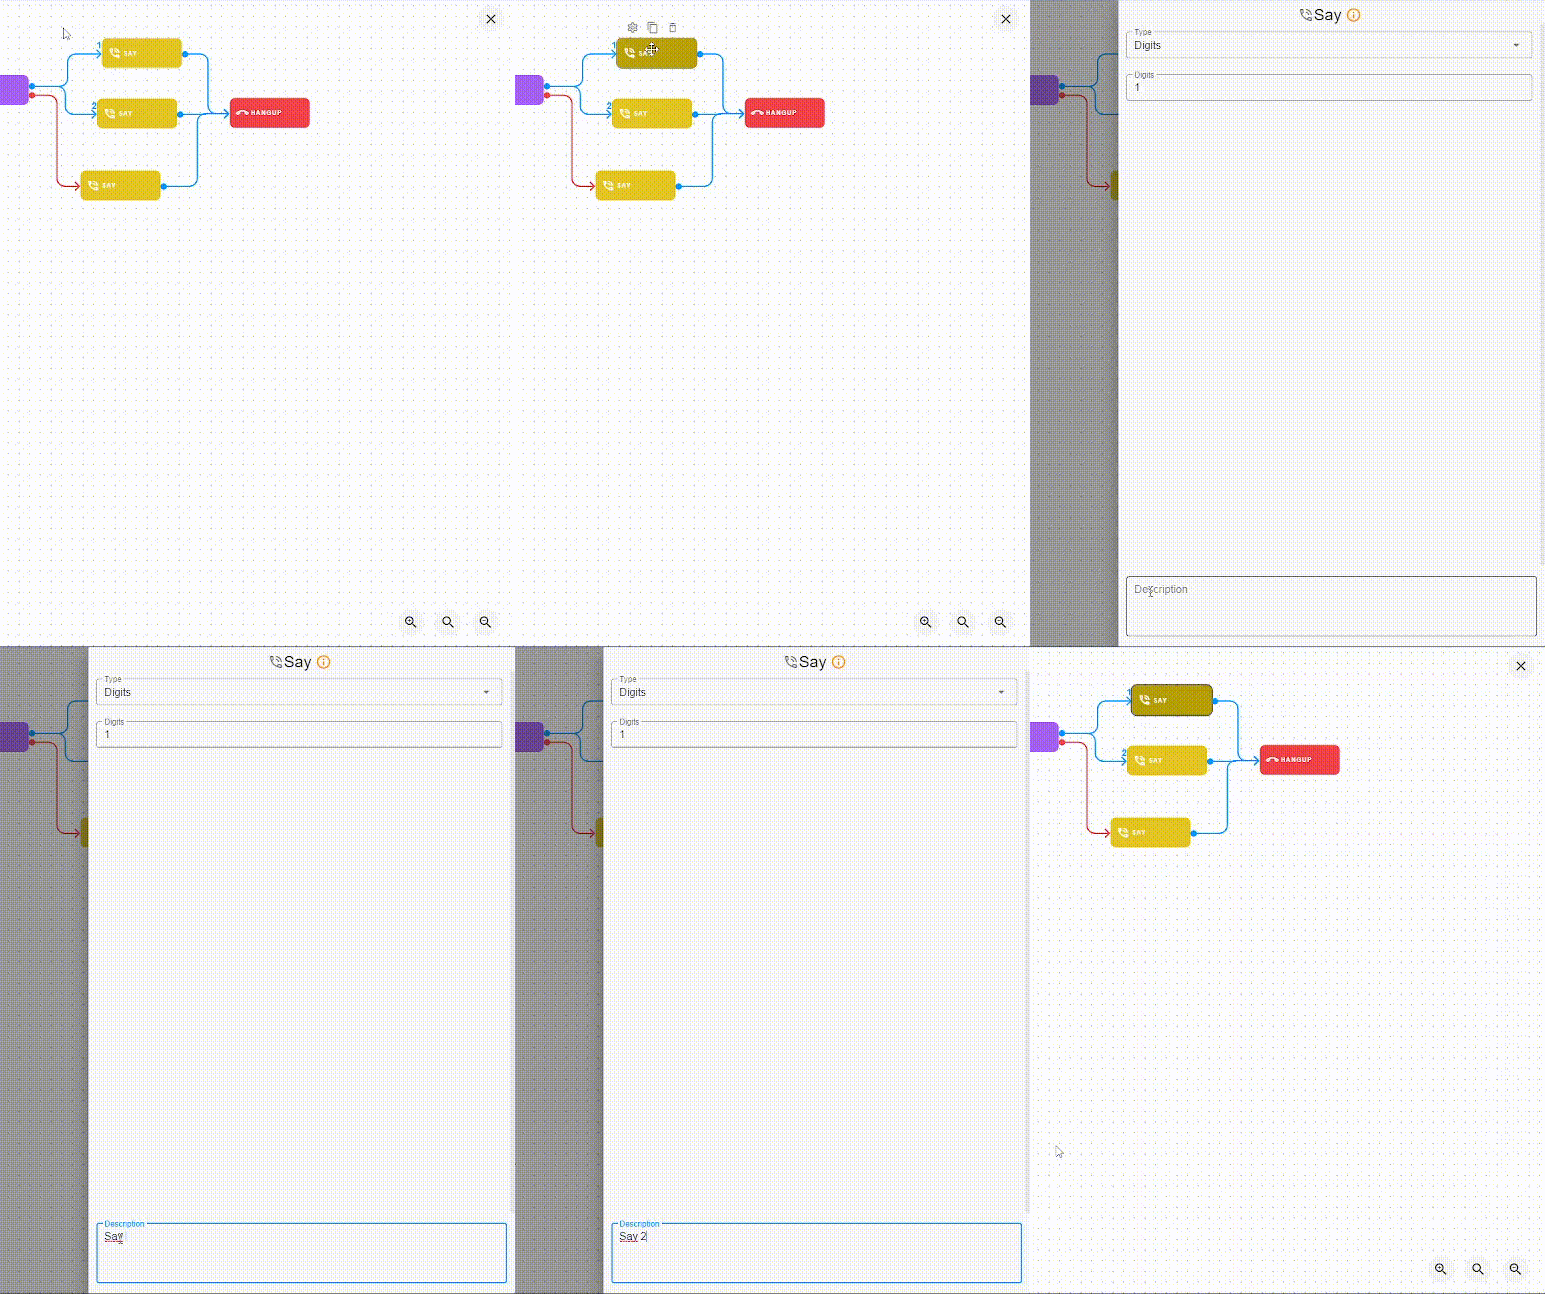
How to configure an activity?
You can open the form of any activity by double-clicking on it. Each form will have a description field and a button to access the documentation for that activity.
How to delete an activity?
To delete selected activities, press the delete key on your keyboard.
Important notes
Generally, only one arrow is allowed per output, but there are some activities that allow multiple arrows. There are activities that are intended to be used at the end of the flow; these do not have outputs.
How to save the flow?
When working on a flow, there are two different ways to save changes.
Save changes without deploying to production
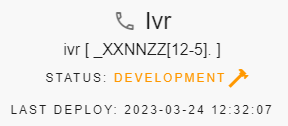
We can save the latest changes in the flow without deploying them by pressing the "Save" button. When saved this way, the flow's status will be shown as "Development."
Save changes and deploy to production
We can save and deploy the latest changes in the flow by pressing the "Deploy" button. When deployed, the flow’s status will be shown as "Deployed."
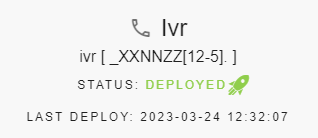
To know if a version of the flow has been deployed, we can check the date of the last deployment. If there is no deployed version, it will say "never."
History
If we save or deploy changes that weren’t meant to be saved, we can easily revert the changes by clicking on the "Open History" button.

How to retrieve a flow version?
Within the history, we’ll see a list of previous versions of the flow and whether they were in development or deployed. We can click on each version to view the flow, and if we want to revert to that version, we simply click "Restore."
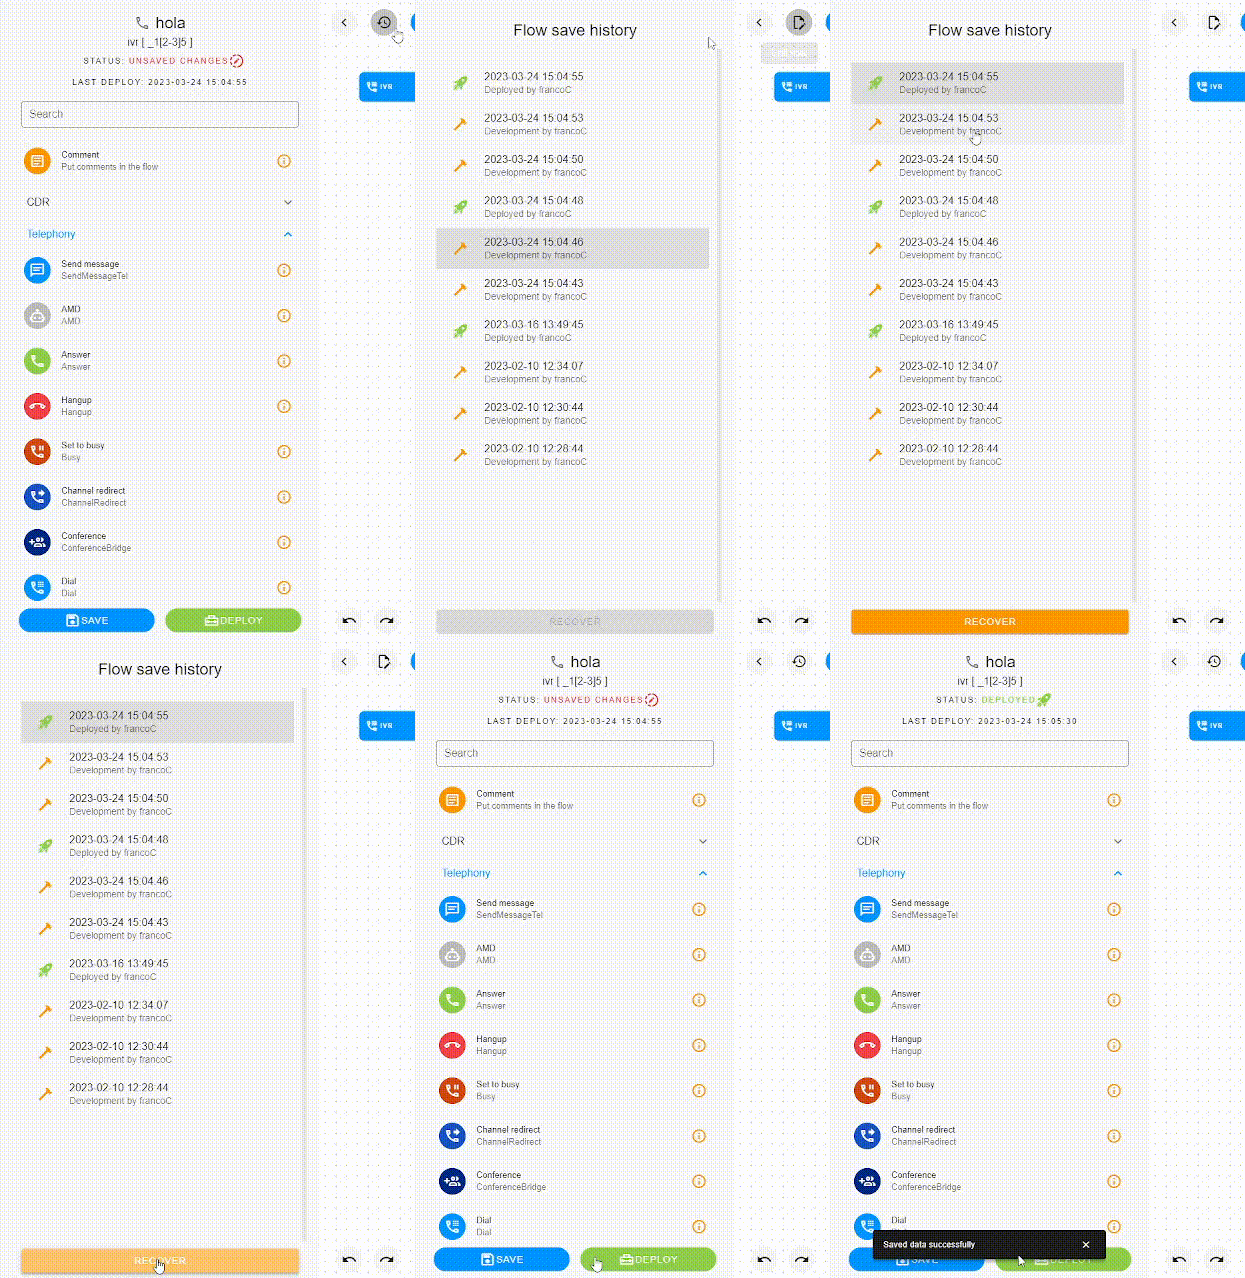
After retrieving the flow, you must save the changes.
